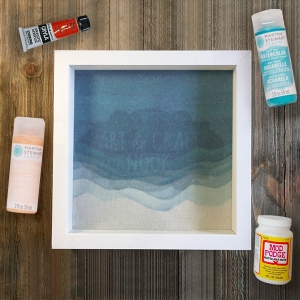
What You’ll Need:
Modge Podge
Holbein Watercolors & brush
Pencil
Scissors
Martha Stewart Metallic paint
Wooden / hardboard box
Folk Art White Chalkboard paint
1 sheet of patterned paper or paper with your own design
Ruler
3 small C-hooks
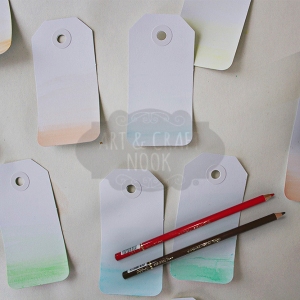
13 gift tags of same size preferably white
Directions:
If the box came with a lid, take it off, as this will not be needed. Paint your box white. If it’s a white box, the step can be skipped.
White the box dries (if painted) prepare the gift tags with your desired colors. Being an enthusiast as you are, you can create your own tags using a slightly thicker sheet of paper. Adding a gradient brightens up the tags. When the tags have dried, prepare the other side in a similar manner.
Leave the tags aside to dry. Cut the patterned paper (you may create your own designs) to the size of the interior of the box. Apply Mod Podge on the box where the patterned paper or your self-creative paper will be pasted and lay the paper on it. Ensure to smoothen out any wrinkles using a thick card or tweezer. Apply another layer of Mod Podge on top of the paper. Allow to dry for 15 minutes.
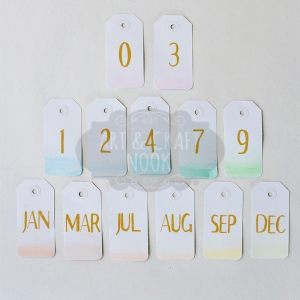
Arrange the tags in sections of 6, 5 and 2 – 6 for the months, the 5 & 2 for day-digits.
Paint or Draw on the tags (front/back): Jan/Feb, Mar/Apr, May/Jun, Jul/Aug, Sep/Oct, Nov/Dec, 0/1, 2/3, 1/2, 3/4, 5/6, 7/8, 9/0
Lay the box on its back. Place three tags evenly into your box. Using the tags as guides make three marks on the ceiling of the box for the c-hooks. Fasten the c-hooks into the top of the box.
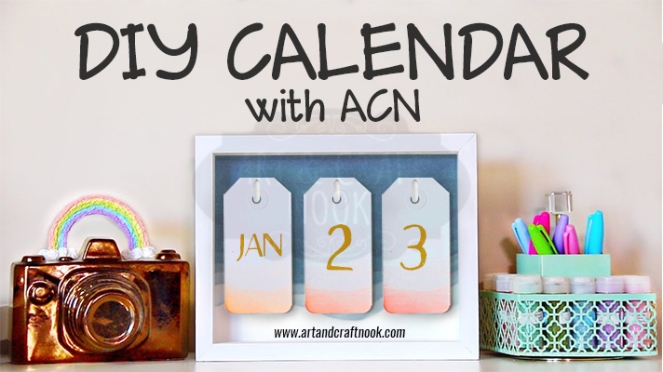
Hang your tags on the hooks. Your calendar is ready to be set in any desired place and admired!

Feel free to share it with us on info@artandcraftuae.com and we will be glad to post it on our Social Media platforms.
Article inspired from Plaid.
